Do you listen to podcasts? Or… How often do you listen to them? Actually, I don’t
know many people who don’t use this format of content consuming.
The word podcast was created in 2004 and combines the words iPod and broadcast.
So it was the ability to download your favorite radio shows and listen to them off the
air. However, times have changed and nowadays we can talk about the golden age of
podcasts. As in all human activities, podcasts have started to evolve into a specific
media format that can take the form of more than just a classic radio show. In fact,
thanks to the possibility of publishing your own podcasts, you can come across
comprehensive analyses, how-to guides, multi-hour interviews, as well as reading
diaries, reports on finance, education, etc. You can tailor-make your radio show, and
it’s already worth it! That’s why the podcast is also widely used as a PR tool. So it’s
worth considering whether you or your organization should have a podcast of your
own!
In this blog post, I won’t go into the creation of podcast content. Instead, I will share
a brief overview of tips and tools on how to produce such a podcast in the highest
possible sonic quality. That’s because bad sound can annoy your listener so much
that they’ll no longer be interested in your content, and therefore your brand. If
these tips aren’t enough, you can contact me – you probably already know the web
address www.zazy.cz, and I’d be happy to help you make your podcast happen. So
let’s get to the tips:
1) Think about where you want to record the podcast or the Sid rule.
Most podcasts are recorded in a regular room – a studio, but interviews outdoors or
in the guest’s home are no exception. So stick to at least two simple rules, which I
call Sid – an acronym for “silent and dry”.
Simply find a place where there is maximum possible silence and minimum
inappropriate reverberation. If it’s not possible to record in complete silence, at least
keep the noise consistently loud and uninterrupted – that’s a bit easier to remove.
In the case of reverberation, clap, HUH and SSS… Listen to what it causes in the
room. Then if the room will extend or amplify this information more than is
appropriate, try to destroy reflective surfaces and parallel walls. Don’t be afraid to
get creative and improvise! Books of different thicknesses stacked randomly in a
bookcase, bottles of different lengths lined with cotton wool, sleeping bags spread
out under the ceiling, a foam mattress placed in the corner of the room… You’ll
figure it out. There are also more exact methods and materials designed specifically
for acoustic treatment. There is a price to pay, of course, and sometimes it’s not a
small one. However, if you underestimate Sid, say goodbye to good sound.
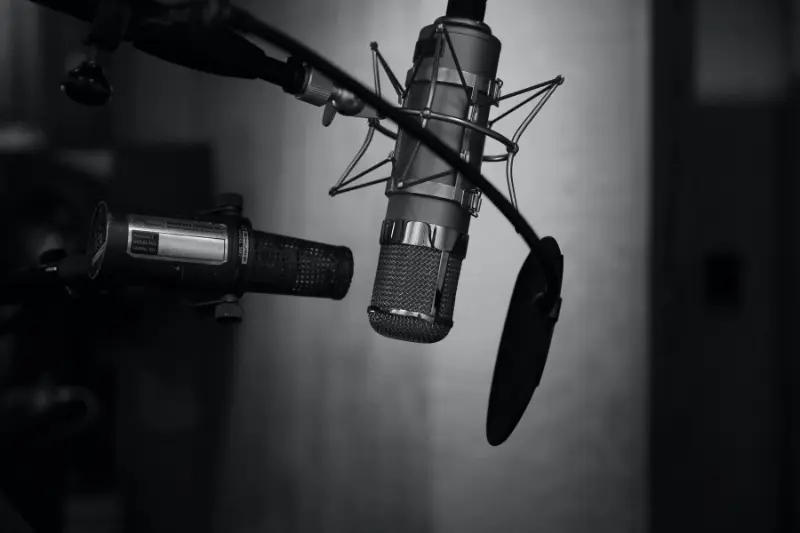
2) Microphone selection. You have three basic choices. Lavalier microphone (you
know from TV interviews), large diaphragm condenser microphone, large diaphragm
dynamic microphone. Each has its own sound and purpose.
The “lav” will “walk” along with you and your guest, keeping the same distance from
the mouth. However, it will also capture all the sound around it, and it may even be
possible for a guest to accidentally hit it. Or clothing will rub on it, or it will be
incorrectly positioned, or it won’t pick up the sound properly when the head moves
sideways.
A “condenser” with a narrower directional characteristic will already be capturing
the person speaking into its diaphragm. But it is a sensitive device, so it’s a good idea
to keep an ear on the sound in your headphones.
The “dynamics” need to be talked at close range, which not every guest can do, and
then you have to constantly correct him. On the other side, you don’t have to worry
about picking up your guest’s heartbeat.
So how to do it? Consider what type of interviews you’re recording and choose your
microphone accordingly. If it’s an action thing, you’ll probably choose a lav, if you
have a good Sid and don’t want to babysit your guests so much, a condenser mic will
give you a natural and rich sound.
But for most radio style interviews you’ll probably use a dynamic large diaphragm
mic.
3) In what to record? If you like simple solutions, then you will find one of the
recording devices such as Zoom H6 or Rode Rodecaster to be suitable. You’ll take
away the hassle of choosing and setting up a sound card.
It would be a different matter if you were interviewing via stream. In that case, you’ll
need to look for a sound card and a suitable broadcast device or software.
Moreover, if you don’t have experience, you will already need the help of a tech-
savvy colleague to take care of the streaming.
In any case, make sure you don’t get a distorted signal at the input. Just do a sound
check and adjust the gain – input sensitivity by speaking in full voice and watching
the meters. When they are close to zero, put that setting a little lower. Because
when it’s going to be on red, people get passionate and talk louder. Then sometimes
the sound gets distorted, and it doesn’t sound good.
4) Listening – i.e. monitoring. Not all guests are willing to wear headphones. But the
presenter should. Choose headphones that are closed-back (no sound leakage) and,
above all, comfortable. Avoid Bluetooth headphones. They have a large enough
delay to reliably confuse you while recording.
5) You have recorded. What next? How to finish it. This part is not as intuitive as the
recording was. A lot depends on how sophisticated your listener is. If you don’t mind
the money, you can get phase correctors, de-noisers or levelers (so that there is not
such a difference between loud and quiet sound). If you want to go into this process
yourself, read on for a bit.
First of all, choose software that suits you. For example, Avid Pro Tools in the Intro
version (it’s free) is suitable. After editing, the next step is to set the nominal level –
called normalisation. This prepares your material for further processing. It also
makes it easier to take advantage of some presets.
Then apply an EQ to each channel to cut the low end below 100 Hz. If any of your
guests have sharp esses, try adding a de-esser in the way. If the sound starts to
sound lisp, then you have it set too much.
Now mix all the tracks into one bus. Then add a compressor or a leveler (or both) on
it and try using the spoken word presets. Some colleagues might argue that it is
better to put the compressor (it reduces the difference between loud and quiet
sound) already on the individual channels. But the problem is that the sound from
one speaker hits all the microphones and creates crosstalks, which would be
enhanced by such use. If you wanted to get rid of the bleeding completely, you
would have to edit the tracks. And if your podcast has 3 hours…
Use a limiter at the end of the chain. Set its “ceiling” so that your output is not over 0
dB (so called into the red). Then set its “threshold” so that it peaks by about 6 dB.
Finally, all that’s left to do is bounce the whole result out and set its overall volume
to -14 LUFS – this is the generally accepted volume on online platforms. And again –
there are a lot of tools for this. If you don’t want to pay, then you can use DaVinci
Resolve for example. But my favorite tool is made by a company called Nugen.
I should probably mention the amount of money you have to be prepared to start
with…
If you are happy with a classic two-voice setup, and you don’t need any additional
tools for sound editing, you can achieve a good quality output this way, and still fit
into the 1000 USD.
Moreover, if you’ve ever edited a video, it won’t be that hard for you to know how to
edit the sound and achieve a result that will make the listener hear your content all
the way through!
I definitely think podcasts will continue to have their place in multimedia content.
They are much faster to produce compared to videos, and you can run into some
very interesting people while hosting a interview! And it’s this social aspect of
podcast production that I think is the best part.